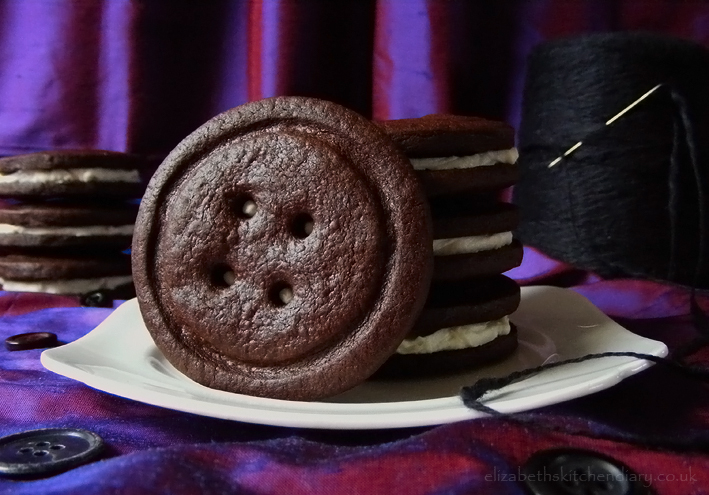
Looking for a fun and unique treat for a Coraline-themed birthday party? Try these homemade button-shaped Oreo cookies! Recipe makes 18 x 2.5 inch cookies.
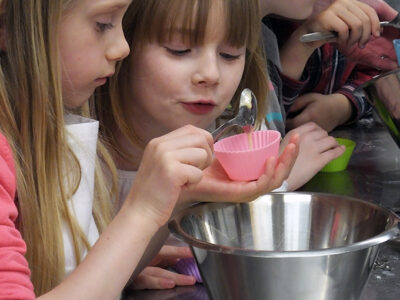
This idea has been filed away in my head for several months now. I’ve wanted to make homemade Oreo cookies for some time, and when my daughter said she’d like a Coraline-themed birthday party this year, I thought this would be a great time to try the cookies and cut them into giant button shapes to match the theme.
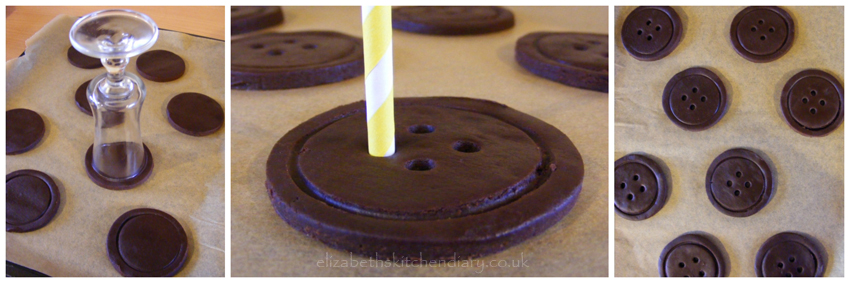
Rest the dough to warm to room temperature before rolling it out to a 1/4 inch thickness. Cut into circles and make the button shapes with a glass edge and straw. This makes for a nice round button shape and it was substantially easier to form the button embellishments. While removing the button holes bits of dough get stuck in the straw. Just snip the straw shorter and shorter as it fills up.
The chocolate flavour of these button cookies is fantastic, and the creamy filling compliments it perfectly. Chill the cookies before serving if you want a hard filling like a shop-bought Oreo.
You really do want to sit with a great big glass of ice-cold milk while eating these gorgeous dark chocolate Coraline button cookies.
Ingredients for these Coraline Button Cookies
To make the Cookies
- 228 grams unsalted butter
- 150 grams caster sugar
- 1 tsp vanilla extract
- 1 large free range egg
- 200 grams dark chocolate
- 90 grams cocoa powder
- 250 grams plain flour
- 1 tsp salt
- 1/2 tsp bicarbonate of soda
For the Filling
- 50 grams unsalted butter
- 65 grams vegetable shortening
- 230 grams icing sugar
- 1 tsp vanilla extract
- 1 tbsp milk
- pinch salt
↓ Jump to the full, printable recipe. ↓
Instructions to make button cookies
- Gently melt butter over a low heat in a small saucepan.
- Whisk together butter and caster sugar in a medium sized bowl.
- Break chocolate into small pieces and gently melt in a heatproof bowl suspended over a pan of barely simmering water.
- Whisk vanilla and melted chocolate into the butter/sugar mixture.
- Whisk in the egg until well combined.
- Sift together flour, cocoa powder, salt and bicarbonate of soda and stir into the chocolate mixture until well combined.
- Cover and refrigerate for two hours, or overnight to firm up.
- Bring dough to room temperature.
- Preheat oven to 160 C
- Cut dough into quarters and roll each quarter to a 1/4 inch thickness.
- Using a 2.5 inch circle cookie cutter cut out shapes and place onto a piece of baking paper on a baking tray.
- Using a glass with a diameter 1/2 inch smaller than the cookie cutter, press a small circle onto the cut cookie dough.
- Using a drinking straw, cut four button holes out of the centre of the cookie.
- Chill cookies in the refrigerator for 10 minutes before baking for 20 minutes.. Transfer to a wire rack to cool completely before icing and assembling.
- To make the filling combine the butter, vegetable shortening, icing sugar, vanilla and milk in a food processor and process until light and creamy.
- Place 1 tbsp of filling onto the bottom of one cookie and sandwich together with another cookie. Press gently in the centre so that some of the filling shows through the button holes.
- Repeat with the remaining cookies. Cookies can be refrigerated to harden the filling, if desired.

Tips for making these Coraline button cookies
- Rest the dough to warm to room temperature before rolling it out to a 1/4 inch thickness.
- Cut into circles and make the button shapes with a glass edge and straw. This makes for a nice round button shape and substantially easier to form the button embellishments.
- While removing the button holes, bits of dough get stuck in the straw. Just snip the straw shorter and shorter as it fills up.
Recipe Difficulty Levels
Easy
Requires basic cooking skills and ingredients you most likely already have in your kitchen.
Moderate
Requires more experience, preparation and/or cooking time. You may have to source special ingredients.
Challenging
Recipes requiring more advanced skills and experience and maybe some special equipment.
Coraline Button Cookies
Ingredients
For the Cookies
- 228 grams unsalted butter
- 150 grams caster sugar
- 1 tsp vanilla extract
- 1 large egg
- 200 grams dark chocolate >85% cocoa solids
- 90 grams cocoa powder
- 250 grams plain flour
- 1 tsp salt
- 1/2 tsp bicarbonate of soda
For the Filling
- 50 grams unsalted butter
- 65 grams vegetable shortening
- 230 grams icing sugar
- 1 tsp vanilla extract
- 1 tbsp milk
- pinch salt
Affiliate Links
This recipe card may contain affiliate ingredient and equipment links. As an Amazon Associate I earn from qualifying purchases.
Equipment
Instructions
- Gently melt butter over a low heat in a small saucepan.
- Whisk together butter and caster sugar in a medium sized bowl.
- Break chocolate into small pieces and gently melt in a heatproof bowl suspended over a pan of barely simmering water.
- Whisk vanilla and melted chocolate into the butter/sugar mixture.
- Whisk in the egg until well combined.
- Sift together flour, cocoa powder, salt and bicarbonate of soda and stir into the chocolate mixture until well combined.
- Cover and refrigerate for two hours, or overnight to firm up.
- Bring dough to room temperature.
- Preheat oven to 160 C
- Cut dough into quarters and roll each quarter to a 1/4 inch thickness.
- Using a 2.5 inch circle cookie cutter cut out shapes and place onto a piece of baking paper on a baking tray.
- Using a glass with a diameter 1/2 inch smaller than the cookie cutter, press a small circle onto the cut cookie dough.
- Using a drinking straw, cut four button holes out of the centre of the cookie.
- Chill cookies in the refrigerator for 10 minutes before baking for 20 minutes.. Transfer to a wire rack to cool completely before icing and assembling.
- To make the filling combine the butter, vegetable shortening, icing sugar, vanilla and milk in a food processor and process until light and creamy.
- Place 1 tbsp of filling onto the bottom of one cookie and sandwich together with another cookie. Press gently in the centre so that some of the filling shows through the button holes.
- Repeat with the remaining cookies. Cookies can be refrigerated to harden the filling, if desired.
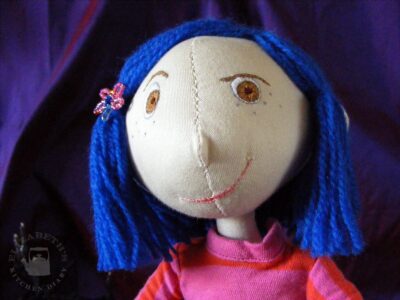
 Free 14″ Fabric Coraline Doll Pattern

Are cocoa solids the same as U.S. chocolate chips?
Cocoa solids are the amount of actual cocoa used in chocolate chips, or dark chocolate. You should see a percentage of cocoa solids in the ingredients list – dark chocolate has a lot more cocoa solids than, say, milk chocolate does.
Oh those do look fun. I’m sure I remember, in my dark, distant past, being told not to play with my food – tosh!
the other half would love these
These are brilliant! Such a simple design, but so incredibly effective!
What a great idea- I bet your daughter enjoyed her birthday party! Thanks for sending these to Alphabakes.
these are just so cute and clever. i have pinned these and will be attempting them one day x
Oh I do hope you do try them! Let me know how you get on if you do. 🙂
there is no egg listed in the ingredients… Assuming one egg?
Yes, apologies, I have added an egg to the list. Note to self: update this old recipe post!
I adore these, and we are big Coraline fans, which makes these doubly wonderful in my book.
Thanks very much for linking this up with #recipeoftheweek. I’ve Pinned and Stumbled this post and there’s a fresh linky just gone live, featuring these! 🙂
Yay! Thank you ever so much Emily 🙂 We’re Coraline fans too. However, I only just read the book for the first time last night – what a fantastic story! I love the way Neil Gaiman thinks 🙂
These look fantastic, Elizabeth, and I love the contrast between the intense dark chocolate and the sweet frosting. And I’m fairly sure I wouldn’t need to wait for a party to enjoy these treats 🙂
Thanks Mark 🙂 They’re far too moreish though – I’ve eaten more than my fair share of them!
I love this idea!!! #weekendbloghop x
😀 Thanks for stopping by!
Looks lovely and very effective too. Found some great new food linkys thanks to your post too.
Thanks Fiona, and I’m delighted you’ve found some new food linkys! 🙂
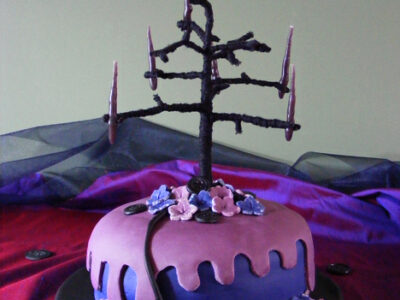
Elizabeth, I absolutely love those button cookies! I know what I’m making for my next quilting get-together. The cake and the doll are spectacular as well. Thanks for playing along with We Should Coca this month!
My pleasure Rebecca, thank you for hosting and for your lovely comment 🙂 Let me know how you get on with the cookies!
You are so clever, creative and capable!
Aw thanks Michelle!
These look so cute and adorable <3
Thank you 🙂
Oh I love these and even more so because you haven’t taken the easy route and used a biscuit mould. Great idea.
Thanks Angela! I had no idea there was a biscuit mould for such things – that would certainly speed things up! 🙂
Elizabeth, I am in love with your chocolate buttons. Oreos are all well and good, but these win hands down. I have a friends birthday to bake for soon and would love to do something similar. Not sure I’ll have the time, but I will if I can. Failing that, they’d make fab Christmas gifts.
They do take a little while to make what with all the chilling and 20 minutes a batch (about 8 halves – four cookies in total) per tray means it does take awhile. I hope you get the chance to make them though. Alternatively, the button technique could be used on smaller shortbread cookies. 🙂 Thank you for your lovely comment!
your biscuits look gorgeous – I made oreos recently and just used cocoa but the idea of using dark chocolate as well sounds even better – glad you made them – maybe another opportunity will come up to present them at a party – I hope so as they are so adorable. And your Coraline doll and cake look wonderful – I haven’t heard of the movie but I love neil gaiman and will check it out and then look more at the cake and doll.
Thank you Johanna 🙂 I’m going to have to give Neil Gaiman’s other books a read, I love his imagination!
Yet another amazing idea and gorgeously photographed. Thank you so much for sharing them witht the Biscuit Barrel challenge!
Aw thanks Laura! Thanks for hosting such a great challenge to share them with!
These look wonderful!
I had no idea who Coraline was and had to look it up. Now I understand!
The cookies are a great idea and I can see hoe the button pattern would work with other biscuits. Thanks for the recipe.
It’s such a fantastic animation – I highly recommend you watch it! I have used this button pattern with shortbread cookies before. They’re quite effective. 🙂