• Skip to main content
  • Skip to header right navigation
  • Skip to after header navigation
  • Skip to site footer
  • Amazon
  • Pinterest
  • Instagram

Elizabeth's Kitchen Diary

cooking up a storm at the edge of the world

  • The Food
    • All Manner of Sweet Things
      • Cake
      • Chocolate
      • Cookies
      • Ice Cream Recipes
      • Squares
      • Everything Else
    • Veggie
      • Salad
      • Vegetarian
      • Vegan
    • Carbohydrates
      • Bread
      • Pasta
      • Potato
      • Gluten Free
      • Rice
      • Pastry
    • Soup
    • Hoof & Feather
      • Beef
      • Chicken
      • Lamb
      • Pork
    • Fin & Shell
      • Scallop Recipes
    • Breakfast
  • The Adventures
    • Shetland
      • Hike Shetland
    • Belgium
    • England
    • France
    • Italy
    • Latvia
    • Norway
    • Scotland
    • Spain
    • The Caribbean
    • USA
  • About Elizabeth
  • Brands I’ve worked with
  • PR & Disclosure
  • Contact Me

Chocolate Florentines

Published on February 15, 2014 • Last updated July 18, 2014 by Elizabeth
The first time I’d ever had a Florentine happened because of a chance encounter with a stranger in a Scottish bakery. I was standing in the queue waiting to order my lunch when the tall, charming gentleman with a posh English accent ahead of me turned to me and asked if I’d ever tried a Florentine. Caught off-guard I blushed and said that I hadn’t, and so he asked the lady behind the counter for a Florentine and handed it to me with a smile and a “Good day!”

I grinned for the rest of the day. That has to rate pretty highly in the ways to impress a woman department, I think. Take notes, single men out there! The rest of that story shall remain untold (on the off chance my husband reads my blog!) but know that it all ended well and said gentleman and I are dear friends to this day.
Fast forward a decade or so to the present day where the lovely Dom from Belleau Kitchen and Choclette over at Chocolate Log Blog have teamed up their respective Random Recipes and We Should Cocoa food blogging challenges for a Valentine’s themed chocolate extravaganza!We were challenged to randomly select a recipe from one of our chocolate cookbooks, make and share it. My first attempt, using numbers randomly selected by our nearly five year old youngest child, resulted in a very stodgy, poorly risen banana, cherry and white chocolate muffins from the Green & Black’s Chocolate Recipes book – Unwrapped: From the Cacao Pod to Muffins, Mousses and Moles (published in 2003).Around the same time said charming gentleman bought me that Florentine, I picked up a copy of this book and I’m surprised to admit I haven’t tried most of the recipes in it. I was very disappointed with the flavour and texture of the muffins I’d made (and have marked my recipe book accordingly) and I couldn’t in all honesty share them with you (although my children loved them). So, I had to find a new random recipe, and the following Florentine recipe was selected.

The recipe book says an entire batch of these biscuits should take less than an hour to make. That is in no way correct! I spent most of a day making these biscuits, and although the flavour is quite lovely the work involved in no way justifies the time spent making them. Saying that, I blanched my own raw almonds, which was time consuming, as was finely chopping them and all the other ingredients.

I replaced the candied orange peel with the same quantity of supermarket brand luxury dried mixed fruit left over from Christmas (which claimed on the packet that it was great for making chocolate Florentines) and I used flaked almonds instead of slivered, because that’s all I had (and I wasn’t running to the shop to buy anything!). I’m in a ‘use up what’s in the store cupboard’ sort of phase just now, and the tail end of a tub of glacé cherries was used in my bake as was the remains of a carton of double cream which, in all honesty, I had no idea how long it had been open in the fridge (it smelled fine so I used it!). As such, I am sharing this recipe with the No Waste Food Challenge guest hosted by Fiona over at London Unattached this month.

Like I said, the biscuits were good, but I don’t think they’re worth the effort unless you haven’t anything else planned for a day and just want to potter about the kitchen for ages. The original recipe instructions said to drop the batter by the teaspoonful onto the prepared baking sheet and claimed they spread to twice their size. So I followed the instructions, using a 5 ml teaspoon as a measure. My first batch of Florentines ended up being ‘fun size’, ideal for the children’s Valentine’s Day packed lunches (they loved them!). Through trial and error I discovered a scant one tablespoonful of batter makes a perfect size biscuit. They don’t spread to twice their size, by the way.

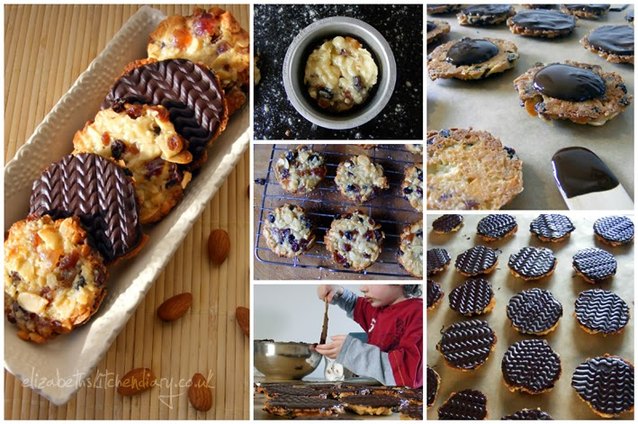
To get the biscuits into perfect, uniform circles you remove them from the oven midway during baking and use a large circle cookie cutter to coax them back into a circular shape. This is easy, but time consuming, especially if you’ve got a tiny oven like me and can only cook six biscuits at a time. Then you need to finish baking them, wait for them to cool for a few minutes on the baking tray before transferring to a wire rack to cool completely.

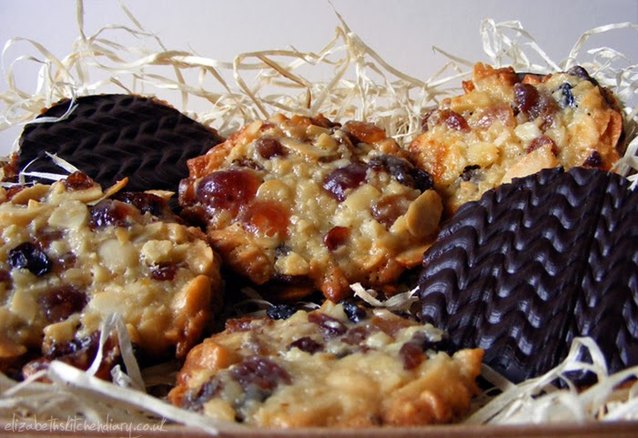
You then spread melted dark chocolate on the flat sides, wait ages for the chocolate to partially set (I ended up opening both kitchen windows trying to speed up the process), and then you create wavy lines on the chocolate using a serrated bread knife. This looks pretty, yes, but results in quite a waste of chocolate as you end up scraping half of the half melted chocolate off the biscuit in the process. Our youngest son helped himself to the semi-solidified chocolate I’d scraped back into the bowl, so it didn’t go to a complete waste!

All in all they were good, but I think the next time I want a Florentine I’ll pick one up in the bakery.

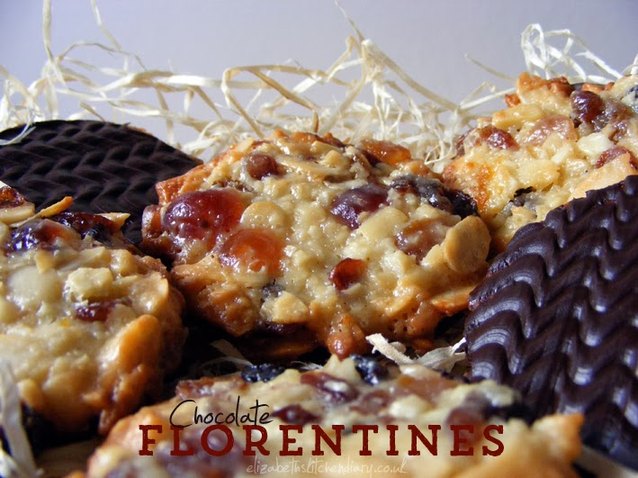
Florentines
by Green & Black’s Chocolate Recipes
A delicate caramelized, chocolate coated biscuit containing cherries, almonds and candied peel.
Ingredients
  • 50 grams unsalted butter
  • 125 ml double cream
  • 125 grams caster sugar
  • 40 grams glacé cherries, washed in hot water, dried and quartered
  • 150 grams blanched almonds, finely chopped
  • 50 grams slivered almonds
  • 100 grams candied orange peel, finely chopped
  • 50 grams plain flour, sifted
  • 250 grams dark chocolate, min. 60% cocoa solids, coarsely broken
Instructions
1. Preheat oven to 180 C/ 350 F. Butter and lightly flour a large baking sheet.
2. Place butter, cream and sugar in a small saucepan over a low heat. Gently melt the butter and slowly bring to the boil.
3. Remove melted mixture from the heat and stir in the cherries, almonds, peel and sifted flour. Mix well.
4. Drop by a scant tablespoonful onto the prepared baking sheet, spacing well apart. Using a fork dipped in cold water flatten each biscuit into a very thin circular shape.
5. Bake for 5-6 minutes and remove from the oven. Using a 3 inch circular biscuit cutter coax the biscuits back into a circular shape.
6. Return to the oven and bake for a further 5-6 minutes, until the biscuits are lightly browned at the edges.
7. Remove from the oven and leave to cool for a few minutes on the baking tray before carefully transferring to a wire rack to cool completely.
8. Gently melt the chocolate in a heatproof bowl suspended over a pan of barely simmering water.
9. Turn the biscuits upside down (flat side facing up) on your work surface and gently spoon about 1 tbsp of melted chocolate onto each. Smooth with a palette knife.
10. When the chocolate has nearly set use a serrated bread knife to create wavy lines on the chocolate. Leave until chocolate sets completely.
11. Store biscuits in the fridge.
Details

Prep time: 20 mins Cook time: 50 mins Total time: 3 hour Yield: Makes 24

I’m also sending this recipe over to Laura’s Biscuit Barrel Challenge over at I’d Much Rather Bake Than… this month’s theme is chocolate!
 

Category: Chocolate, Cookies, Recipe

About Elizabeth

Solivagant. Foodie. Calls Shetland home.

Previous Post:Chocolate Black Bean Brownies
Next Post:Rosehips on the Kitchen Table

Reader Interactions

Comments

  1. Natally

    May 8, 2015 at 8:10 pm

    These look so lovely i’m going to make some for the ward i’m currently on. Hope I can do them justice

    Reply
  2. Paul Wilson

    September 4, 2014 at 7:00 am

    How yummy do they look!

    Reply
  3. London Unattached Food

    March 2, 2014 at 12:22 pm

    They look lovely! Mum used to make florentines every christmas and I don’t think you CAN buy ones that taste as good as the home made one!

    Reply
  4. Charlene F

    February 18, 2014 at 6:58 pm

    Although the florentines were time consuming they look lovely!

    Reply
  5. Choclette

    February 17, 2014 at 12:01 pm

    Oh this post did make me chuckle. I think we’ve all been there, me more than most I suspect. Recipes that state 30 minutes usually see me in the kitchen for at least 2 hours! Loved your story about the kindly donation of a florentine and lovely to hear that encounter led to friendship.

    But really, your florentines look absolutely spectacular Elizabeth and the wavy lines on the back do make them seem extra special. I didn’t bother with that bit when I made florentines, but sort of wish I had now. Thanks for entering them into our joint WSC & RR challenge.

    Reply
  6. belleau kitchen

    February 17, 2014 at 10:27 am

    absolutely stunning florentines… I adore their chewy goodness and they look so pretty… so frustrating when books get it wrong, I hate that when it’s not clear it then up to you… a lot of effort but i’m so glad you made them, thanks for the wonderful entry xx

    Reply
  7. Rebecca - Bakenquilt.com

    February 16, 2014 at 7:08 pm

    They may have been a huge amount of work, but visually they really pay off! I just love that wavy pattern in the chocolate.

    Reply
  8. Johanna GGG

    February 15, 2014 at 1:43 pm

    Your wavy lines look perfect- I think I must try it with the breadknife – I am used to using a fork. I have made florentines and found this quite easy but it was a while ago and I think I was doing other things while they baked and the chocolate half set – though I do agree the chocolate business is fiddly – I made them with condensed milk as I have a weakness for the stuff. But as they are a favourite biscuit of mine I am quite prepared to spend a bit of time on them. Am curious about the rest of your story with your posh english gentleman – I wish random gentlemen would buy me florentines 🙂

    Reply
  9. Laura Denman

    February 15, 2014 at 11:59 am

    Once again your photos have me wanting to get into the kitchen to get baking, no matter how long they take! Thanks for sharing them with the biscuit Barrel challenge =)

    Reply
    • Elizabeth S

      February 15, 2014 at 12:44 pm

      Aw, what a lovely thing to say! I’m glad you find what I do inspirational. xx

      Reply

Leave a Reply Cancel reply

Your email address will not be published. Required fields are marked *

Did you enjoy the recipe? We'd love your feedback! Please leave a star rating.


Sidebar

Cooking up a storm at the edge of the world

Image of Elizabeth Atia making a cake in the Aald Harbour Hoose, Shetland. Photograph by Misa Hay from Shetland Wool Adventures.

Welcome to Elizabeth’s Kitchen Diary, Scotland’s most northerly award-winning food blog.

I’m based in the wild and remote Shetland Islands, where I’ve been sharing my adventure-fuelling recipes since 2011.

As seen on Shetland: Scotland’s Wondrous Isles on Channel 5.

“Never underestimate the power of your own story. Life may have taken unexpected turns, but it’s never too late to weave new threads of adventure into your tapestry. Keep spinning those yarns, my friend.

Recent Posts

Image of turkey Wellington with a slice out of it showing the layers of roast turkey, stuffing and crisp pastry.

Copyright © 2011–2025 EKD Services Ltd · Privacy Policy · All Rights Reserved · Website by Callia Web

Company Number: SC643807 · Registered Business Address:  36 Angusfield Avenue, Aberdeen, AB15 6AQ