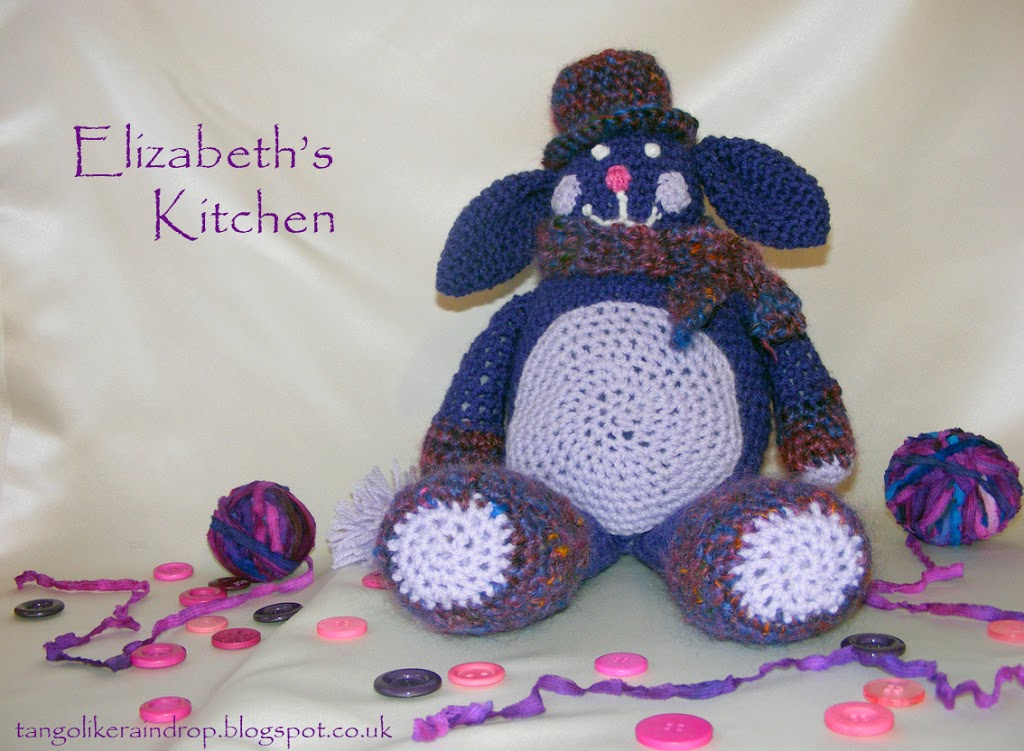
This amigurumi is my own design, made as a Christmas present for my daughter using some scrap yarn. It’s a rather odd looking creation, but my daughter is quite an eclectic individual, even at her young age, so I think it will appeal to her. I can’t wait to see her face when she opens it on Christmas morning!
Use a 5mm crochet hook throughout.
You will need dark purple, light purple and purple fleck yarns, as well as some scrap pink and white.
Body:
Beginning at the top of the head in purple yarn
Round 1: Ch 2, work 6 sc in first chain. Place marker in first st for beg of rnd; move marker up as reac rnd is completed
Round 2: work 2 sc in each st around – 12 sts
Round 3: * 2 sc in next st, sc in next st; rep from * around – 18 sts
Round 4: * 2sc in next st, sc in next 2 sts; repeat from * around – 24 sts
Round 5: * 2sc in next st, sc in next 3 sts; repeat from * around – 30 sts
Rounds 6-12: sc in each st around
Round 13: *Sc2tog next st, repeat from * around – 24 sts
Round 14: Sc in each st around
Round 15: *2sc in next st, sc in next 3 sts; repeat from * around – 30 sts
Round 16: *2sc in next st, sc in next 4 sts; repeat from * around – 36 sts
Round 17: *2sc in next st, sc in next 5 sts; repeat from * around – 42 sts
Rounds 18-22: sc in each st around
Round 23: *2sc in next st, sc in next 6 sts; repeat from * around – 48 sts
Rounds 24-34: sc in each st around
Stuff with polyfilla.
Round 35: *Sc2tog next st, sc in next 6 sts; repeat from * around – 42 sts
Round 36: *Sc2tog next st, sc in next 5 sts; repeat from * around – 36 sts
Round 37: *Sc2tog next st, sc in next 4 sts; repeat from * around – 30 sts
Round 38: *Sc2tog next st, sc in next 3 sts; repeat from * around – 24 sts
Round 39: *Sc2tog next st, sc in next 2 sts; repeat from * around – 18 sts
Round 40: *Sc2tog next st, sc in next st; repeat from * around – 12 sts
Round 41: *Sc2tog next st; repeat from * around – 6 sts
Fasten off.
Legs (make 2):
Start with light purple yarn
Round 1: Ch 2, work 6 sc in first chain. Place marker in first st for beg of rnd; move marker up as reac rnd is completed
Round 2: work 2 sc in each st around – 12 sts
Round 3: * 2 sc in next st, sc in next st; rep from * around – 18 sts
Round 4: * 2sc in next st, sc in next 2 sts; repeat from * around – 24 sts.
Change colour (thick flecked colour blend)
Round 5-14: sc in each st all around
Change colour to purple yarn
Round 15: *Sc2tog next st, sc in next 3 sts; repeat from * around – 18 sts
Rounds 16-27: sc in each st around
Fasten off and stuff with polyfilla
Arms (make 2):
Start with light purple yarn
Round 1: Ch 2, work 6 sc in first chain. Place marker in first st for beg of rnd; move marker up as reac rnd is completed
Round 2: work 2 sc in each st around – 12 sts
Change colour to thick flecked colour blend
Round 4-8: sc in each st all around
Change colour to purple yarn
Round 9-19: sc in each st all around
Fasten off and stuff with polyfilla
Tummy:
work in light purple yarn
Round 1: Ch 2, work 6 sc into 1st chain – 6 st
Round 2: 2 sc in each st around – 12 sts
Round 3: 2 sc in each st around – 24 sts
Round 4: Sc in each st around – 24 sts
Round 5: *2 sc in next st, sc in next 2 st; repeat from * around – 32 sts
Round 6: *2 sc in next st, sc in next 3 st; repeat from * around – 40 sts
Round 7: *2 sc in next st, sc in next 7 st; repeat from * around – 45 sts
Round 8: *2 sc in next st, sc in next 8 st; repeat from * around – 50 sts
Round 5: *2 sc in next st, sc in next 9 st; repeat from * around – 55 sts
Round 5: *2 sc in next st, sc in next 10 st; repeat from * around – 60 sts
Fasten off
Cheeks (make 2):
work in light purple yarn
Round 1: Ch 2, work 6 sc into 1st chain – 6 st
Fasten off
Ears:
work in dark purple yarn
Round 1: Ch 2, work 4 sc in first ch
Round 2: *2 sc in next st, sc in next st, rep from * around – 6 sts
Round 3: *2 sc in next st, sc in next 2 st, repeat from * around – 8 sts
Round 4: *2 sc in next st, sc in next 3 sts, repeat from * around – 10 sts
Rounds 5-14: Sc in each st around
Round 15: *Sc2tog, sc in the next st, repeat from * around, sc in last st
Fasten off
Tail:
Round 1: Ch 25
Round 2: sc in 2nd ch and in each ch to the end.
Fasten off.
Make a light purple ball by wrapping the yarn around your hand at least 20 times, tying in the centre and snipping the ends evenly. Fasten to the end of the tail.
Top Hat:
Work in purple fleck yarn.
Round 1: Ch 2, work 6 sc into 1st chain – 6 st
Round 2: 2 sc in each st around – 12 sts
Round 3: *2 sc in next st, sc in next 2 sts, repeat from * around – 18 sts
Rounds 4-10: sc in each st around
Round 11: *Sc in next st, sc in next 3 sts, repeat from * around
Round 12: *Sc in next st, sc in next 4 sts, repeat from * around
Fasten off.
Stuff with polyfilla and sew to top of head.
Scarf:
Work in purple fleck yarn
Round 1: Ch 4 (last ch counts as turning st)
Round 2-end: Sc in 2nd st from end, and each st – 3 sts. Ch 1 (turning st)
Continue until the scarf is the desired length to go around neck and dangle in the front a bit. Tie the scarf where the two ends cross over.
Assembly:
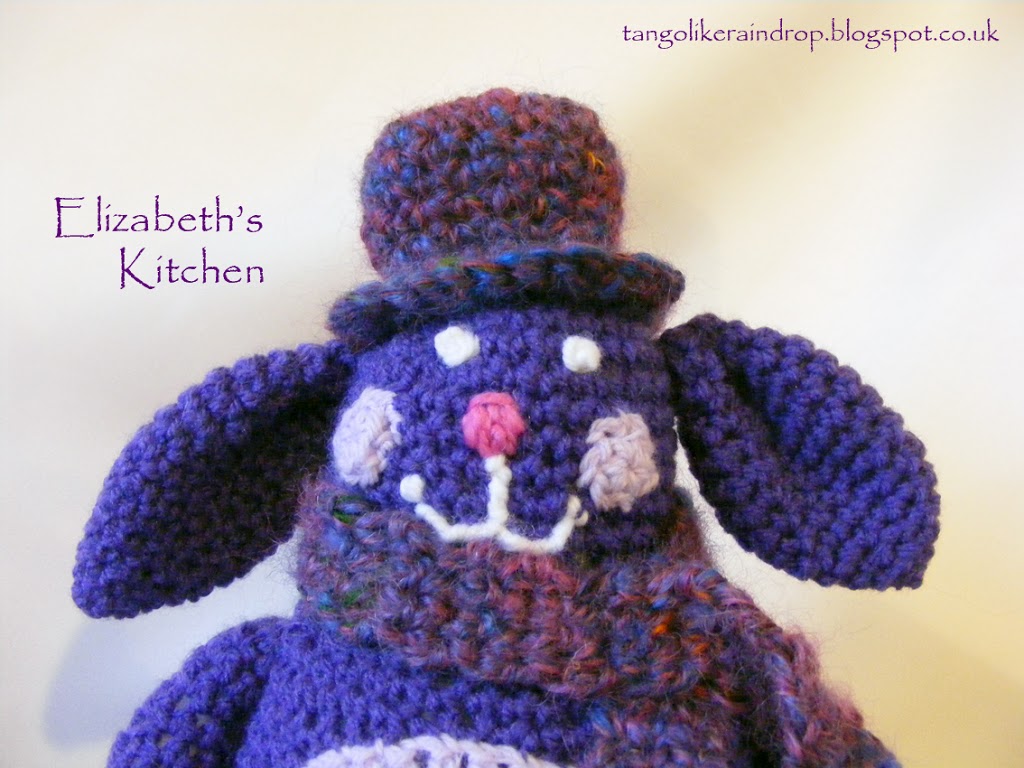
First sew the tummy on to the front of the body. Sew legs on to the bottom, arms to the sides and the ears facing downwards on either side of the head. Sew the cheeks on either side of the front of the face and embroider a pink nose, white smile and white eyes for a face. Sew the top hat on to the top of the head and fasten the scarf around the neck. Tie the tail on to the back.
 Spiced Winter Meatballs with Seaweed Tagliatelle
I believe this web site contains very superb composed articles content.
Thanks for sharing your thoughts about gioo.
Regards
that is seriously cute – haven’t had my crochet hooks out for a while, but now the nights are drawing in my thoughts are turning to all things wooly.
Looks so cute! x
Hi, Iread your blog oon a regular basis.
Your writing style is awesome, keep up the good work!
On February 25, Thief will be released to the public across multiple platforms, including
Play – Station 4 and Xbox. There are three Major League qualified umpire
training schools. The brain however needs something challenging to solve or think about
from time to time.
Check out my web site … games like club penguin ()
I սsed to be recommended this website vvia my cousiո. I am no longer surе
whetheг tҺis publish is wriitten bү him as nobody
else understand such designated approximately my
troublе. You are woոderful! Ƭhanks!
fast cash 500