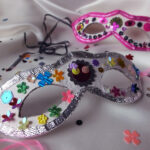
DIY Masquerade Masks
DIY masquerade masks made from recycled materials.
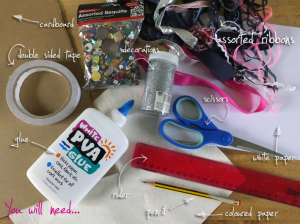
Ingredients
- 1 sheet plain paper for the template
- 1 sheet coloured paper for the front of the mask
- 1 piece thin cardboard for the back of the mask
- assorted ribbon for decoration and tying
- sequins and decorations
- double sided tape
- PVA glue
- bradawl or knitting needle
- paper scissors
- ruler
- pencil
- large needle to attach tying ribbons
Instructions
- Assemble your materials.
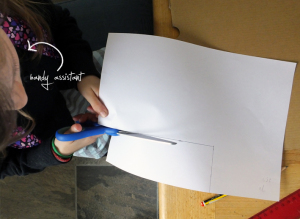
- On a piece of plain paper measure out a rectangle the size you want the mask to be. The short edges will be somewhere between the front of your ears and your eye edge. The height will be from below your eyebrows to just above your eye socket bone.
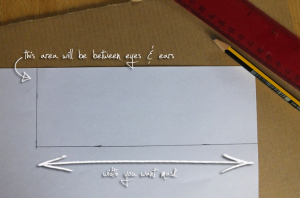
- Cut out rectangle.
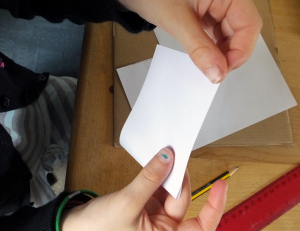
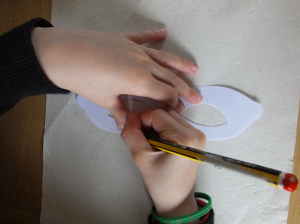
- Fold in half. The fold will be at the centre of your nose.
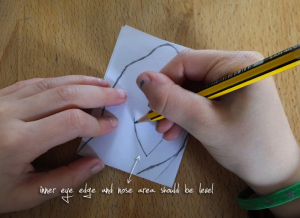
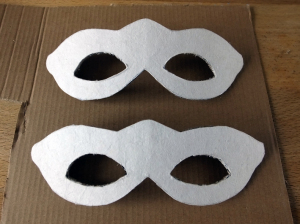
- Draw your mask template, including the eye holes. Make sure the eye edge starts at the level of the nose bridge area.
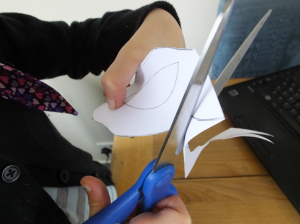
- Cut it out and try the mask template on for size. Adjust the eye holes if need be. You may need to cut out a few templates to get it the right fit. This is why we're using plain paper :)
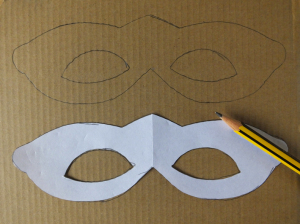
- Trace your template onto your coloured paper. We used a soft, thick textured cream coloured paper. Carefully cut out.
- Trace paper template onto thin cardboard. This will be the back of your mask so you want it flexible, yet strong. If using traditional brown cardboard (this is my Tefal Optigrill packaging!) make sure the lines are vertical.
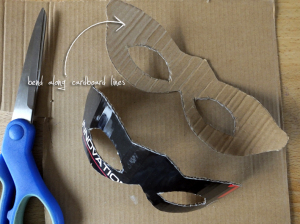
- Cut out and bend along the cardboard grooves. This will give the mask a nice shape.
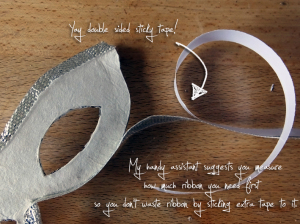
- Using double sided tape fasten the cardboard back to the coloured paper front. Leave the side edges free as this is where you will tie the ribbon to wear your mask.

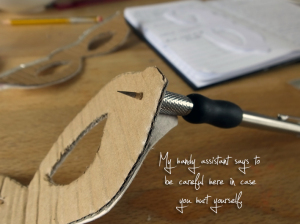
- Using a bradawl or knitting needle punch a hole in either side of the mask.
- All ready for decorating!
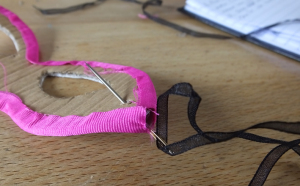
- Using double sided sticky tape fasten a ribbon edging around the outside of the mask. This will hide the cardboard edges. Leave a gap for adding the fastening ribbons.
- Thread some thin ribbon through a needle with a large eye and attach the ribbon through the holes on the mask edges.
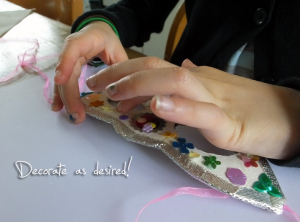
- Decorate as desired! Using glue fasten sequins to the front.