
I am a hoarder of little things. Bits of ribbon on boxes of chocolates, uncrumpled pieces of gift wrap, buttons, sequins, oh just about anything that could possibly be upcycled into something else instead of getting chucked in the bin. I have a writing bureau with ten drawers, each filled with themed scraps: there’s the Things That Stick Things Together drawer (tapes, glues, paper clips, etc), the Ribbon and Stray Decorating Bits drawer, the Paper Drawer, the Pen & Pencils drawer; I’m sure you get it.
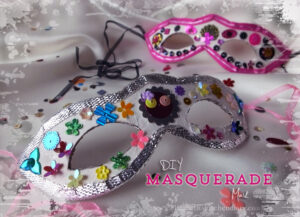
Last weekend DD and I got creative with some of these scrap bits and we made a set of masquerade masks for dressing up play. Well, if I’m being honest they were going to be used for a tutu review – we had the idea that we could do a good fairy/naughty fairy video story, but we ended up scrapping that idea and went with a skater chick rock video instead. You have to see it – we’re so very proud of it!
So, the masks… this is what we did:

Ingredients
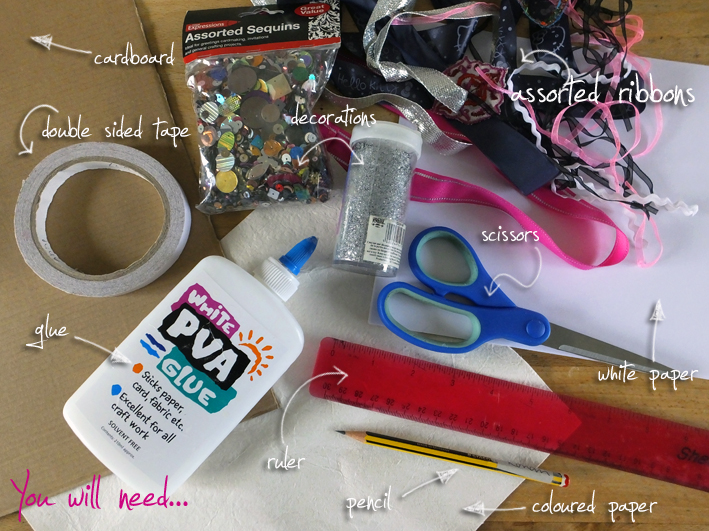
- 1 sheet plain paper for the template
- 1 sheet coloured paper for the front of the mask
- 1 piece thin cardboard for the back of the mask
- assorted ribbon for decoration and tying
- sequins and decorations
- double sided tape
- PVA glue
- bradawl or knitting needle
- paper scissors
- ruler
- pencil
- large needle to attach tying ribbons
Affiliate Links
This recipe card may contain affiliate ingredient and equipment links. As an Amazon Associate I earn from qualifying purchases.
Instructions
- Assemble your materials.

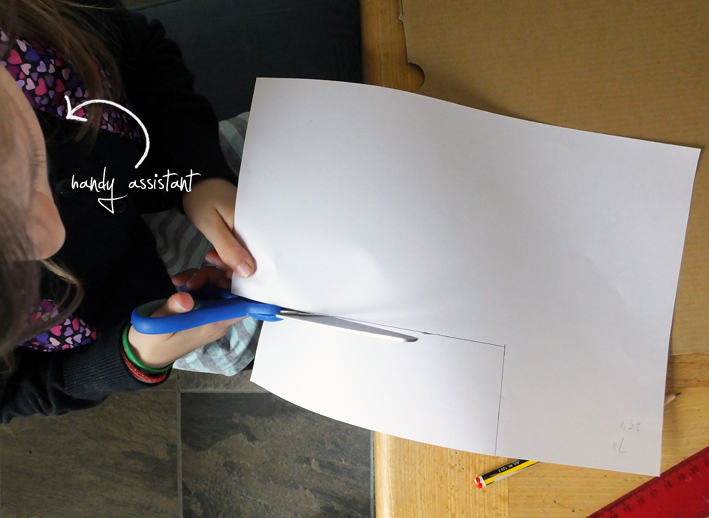
- On a piece of plain paper measure out a rectangle the size you want the mask to be. The short edges will be somewhere between the front of your ears and your eye edge. The height will be from below your eyebrows to just above your eye socket bone.

- Cut out rectangle.

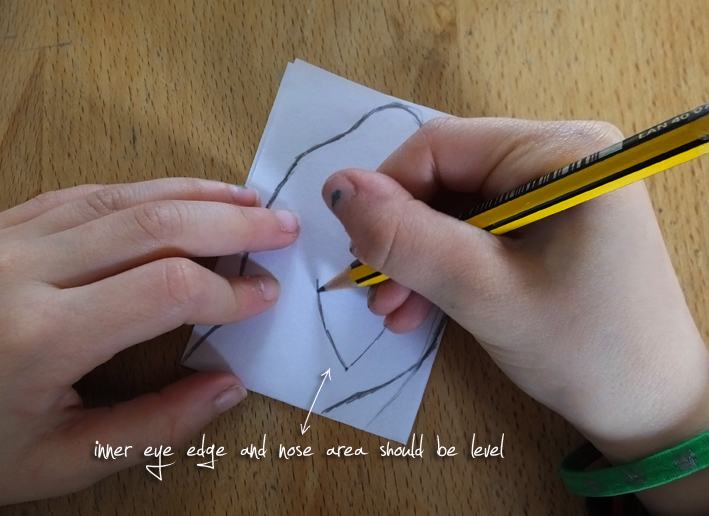
- Fold in half. The fold will be at the centre of your nose.

- Draw your mask template, including the eye holes. Make sure the eye edge starts at the level of the nose bridge area.

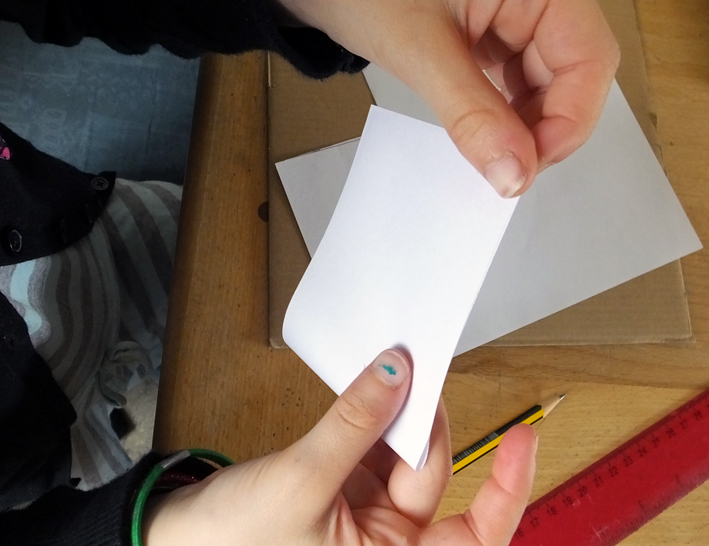
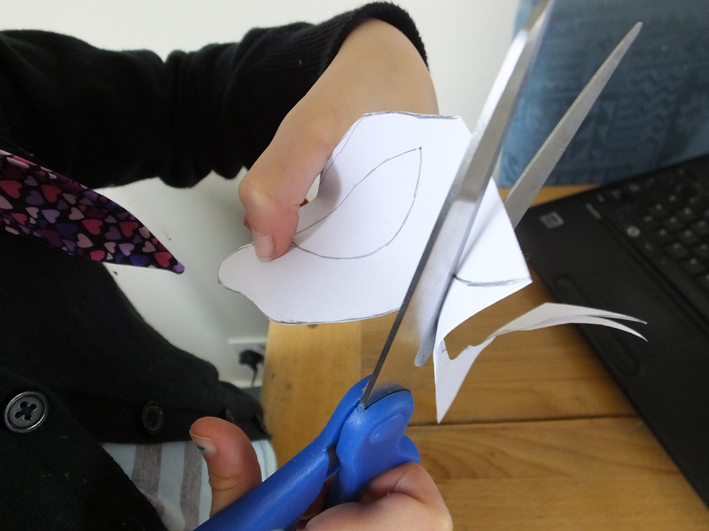
- Cut it out and try the mask template on for size. Adjust the eye holes if need be. You may need to cut out a few templates to get it the right fit. This is why we're using plain paper 🙂
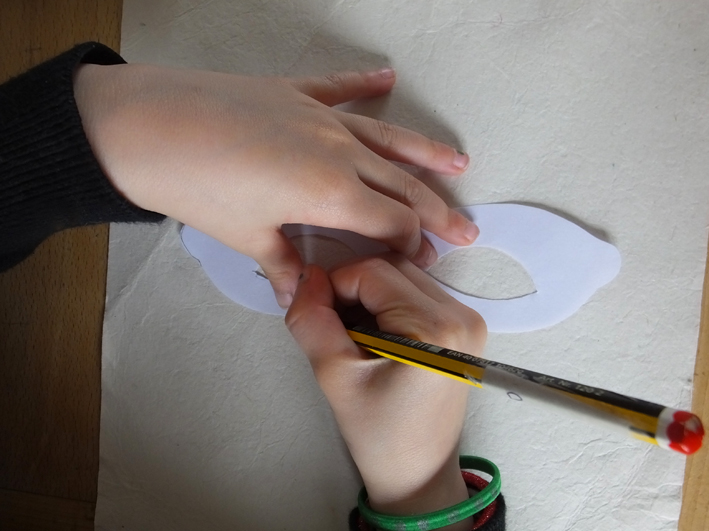
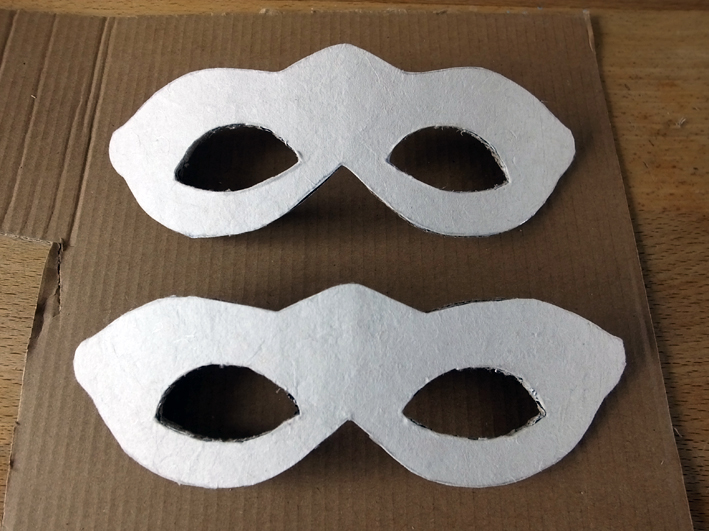
- Trace your template onto your coloured paper. We used a soft, thick textured cream coloured paper. Carefully cut out.
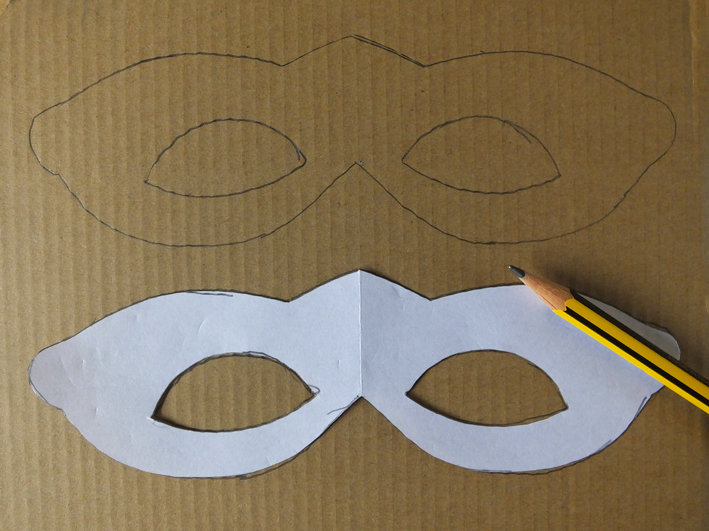
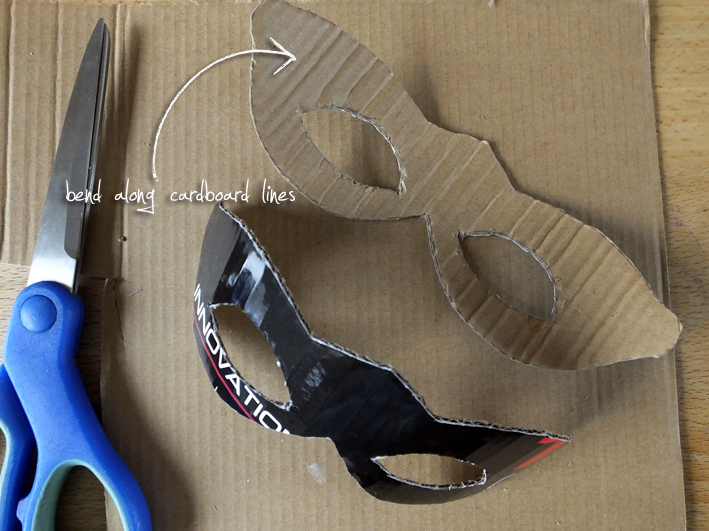
- Trace paper template onto thin cardboard. This will be the back of your mask so you want it flexible, yet strong. If using traditional brown cardboard (this is my Tefal Optigrill packaging!) make sure the lines are vertical.
- Cut out and bend along the cardboard grooves. This will give the mask a nice shape.
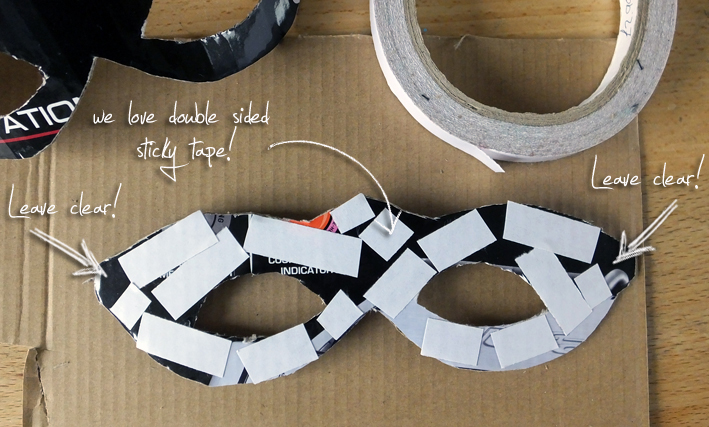
- Using double sided tape fasten the cardboard back to the coloured paper front. Leave the side edges free as this is where you will tie the ribbon to wear your mask.

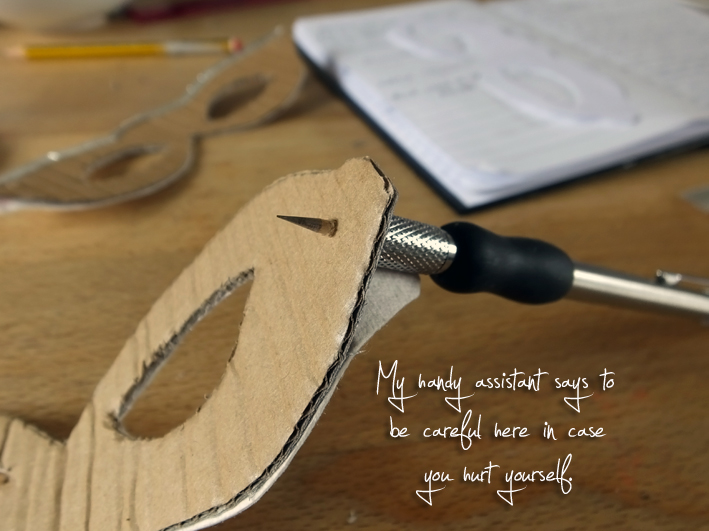
- Using a bradawl or knitting needle punch a hole in either side of the mask.
- All ready for decorating!
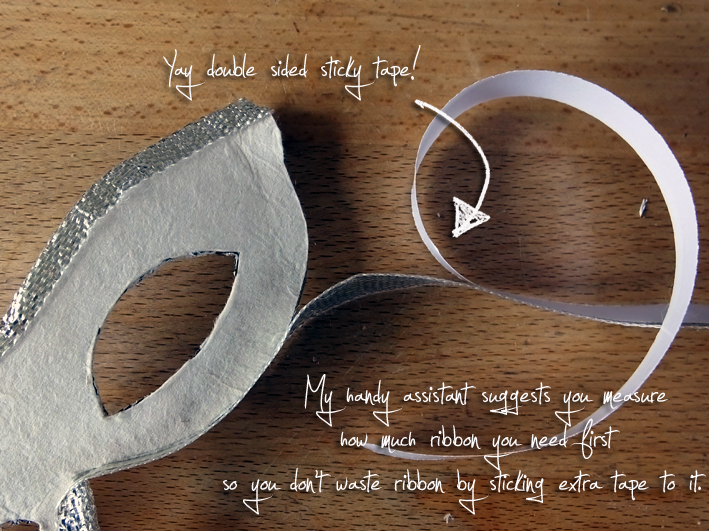
- Using double sided sticky tape fasten a ribbon edging around the outside of the mask. This will hide the cardboard edges. Leave a gap for adding the fastening ribbons.
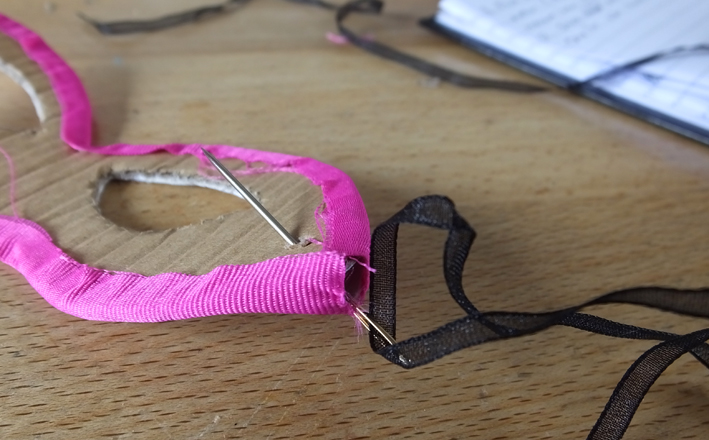
- Thread some thin ribbon through a needle with a large eye and attach the ribbon through the holes on the mask edges.

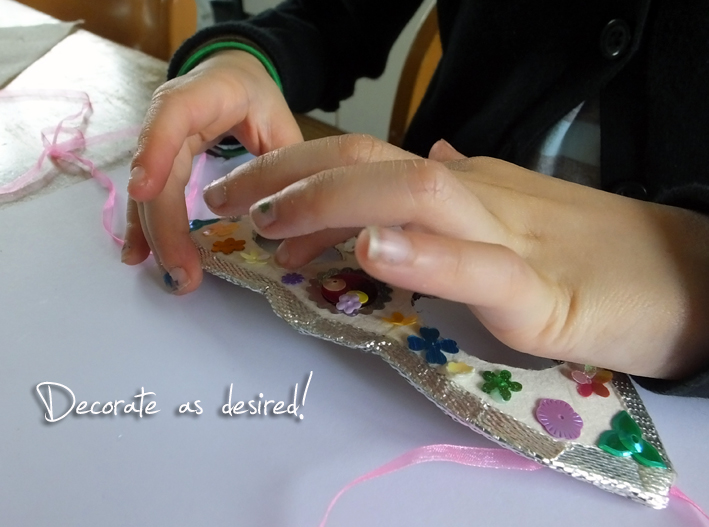
- Decorate as desired! Using glue fasten sequins to the front.


Listen to an audiobook while you cook!
Amazon is offering 3 months of Audible for only 99p. Alternatively, sign up for a free 30-day trial of Amazon Music Unlimited. Offer ends 1 May 2024.

 Shop Local May 2014 Round Up
I have never made my own, in all truth, I wouldnt know how until now, but this looks amazing x
Wow, what a fab idea
Love the simple instructions.. There is a category for home made masks at the WI craft fair and I will try making this to enter this year
They look great. My girls would love to make some. Thanks for the post.
I love these and great to do on rainy days too.
These look great! I bet they were a lot of fun to make
these are so pretty and so easy, we will be making these for Halloween
I love these! I also hoard all sorts of bits and pieces, I don’t think I’ve ever bought any ribbon or tissue paper, I just seem to end up with them! (The tutu video is fantastic too!)
Glad to hear I’m not alone in the craft supplies hoarding department! 🙂 Delighted that you enjoyed our tutu video too!
Oh, I love this and I’m sure my girls would love it even more… I need to remember this before next dress up party, thanks for sharing (!)
you are really creative thanks for the ideas
Very creative!
Thanks Bev 🙂 We had a lot of fun making these!
Those are gorgeoous. My daughter made one recently and I love it. I so envy you both for your artistic flair.
So glad I’m not the only one who saves bits & bobs! I always think ahead: already planning homemade Christmas prezzies & cards!
Fantastic! I really ought to be more organized with Christmas things.
These are gorgeous. What a great idea.
These look lovely! x
These are lovely. I might try this – my daughters love wearing masks and glasses, so I think this activity would go down a treat!
I collect Venetian masks and you’ve reminded me that *somewhere* I have some blank ones to decorate! They look lovely 🙂 #weekendbloghop
OOh blank masks to decorate – how much fun will that be! Thanks for visiting 🙂
These look fab! I think my girls would love to make one each! Thank you!
Do share a photo via Twitter if you do; I’d love to see them! 🙂
Grace sys – These are so pretty. I love masks and I think these are awesome. You could wear them to a fancy dress party. Awesome job.
Thanks for linking to #minicreations
Aw thank you Grace! 😀
These look great! Weasel masks last week but predictably ours had to be of Batman 😉 #pintorials
Batman masks would be awesome – what a great idea! Our son would love that!
So pretty, my girls would love these for their dressing up box #tuesdaytutorials
Thanks Louisa 🙂 I’m a big fan of dressing up and I think I’ve passed this trait onto the children!
Pretty craft! Would be nice for teaching about Mardi Gras! Or for a masked birthday party for children!
Thanks 🙂 I thought they would make nice birthday favours for a children’s party. They could be made blank, in advance, and then the children could decorate them themselves and take their own masks home!
These are really lovely! Your instructions are so clear and easy to understand and your post looks so professional! I think that I will add your idea to my summer holiday fun list that I’m making to keep me and Faith busy over the summer. Thanks so much for linking to #ThemedFamilyFun xx
Thank you Denise, I’m glad it turned out well! We do have a lot of fun when we craft – we really ought to do it more often.